


Hi Everyone, in this blog, we are going to see about creating a Bootable USB Flash Drive Using CMD.
When you use a Bootable Flash drive it allows you to boot the computer from the files present on the flash drive rather than your inbuilt hard drive or SSD. Below I have listed out the uses and steps of creating a bootable USB Flash Drive using CMD.
WHAT IS THE USE OF CREATING A BOOTABLE USB FLASH DRIVE?
- To use as a
recovery systemto repair your PC. - To
store an imageof the operating system. - To
upgrade/downgradeto any operating system version. - To use a
portal operating systemon a foreign computer. - To boot after a
PC emergencyscreen appears. - For the
reinstallationof the operating system.
REQUIREMENTS:
A USB drive with at least 4GB of memory for 32-bit/8GB of memory for 64-bit.
A computer/laptop.
An operating system zip/image file.
HOW TO MAKE A BOOTABLE FLASH DRIVE?
STEP 1: Insert the USB drive into your computer’s USB port.
STEP 2: Search for the “cmd”-[command prompt] application in the Windows start menu, then right-click and select “Run as administrator”.
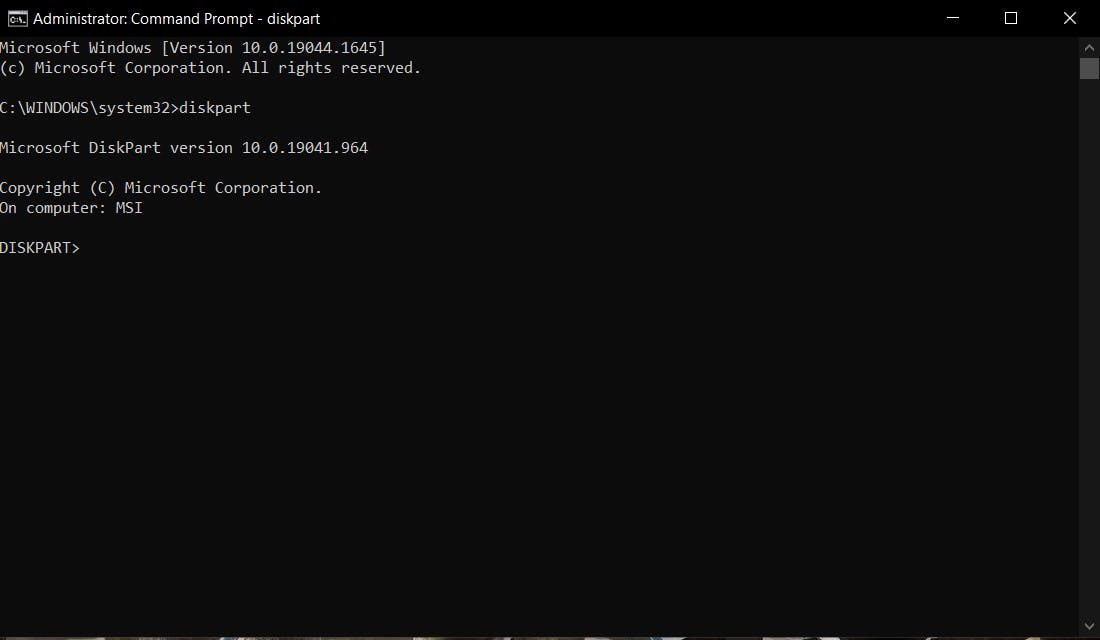
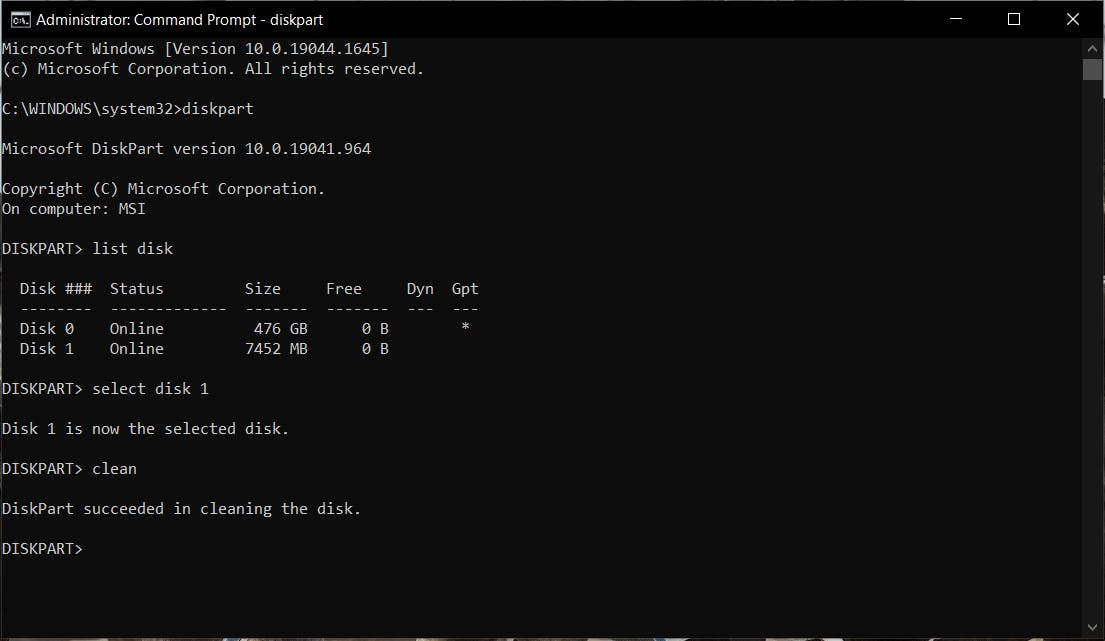
STEP 3: Type the command “diskpart” and click enter. This starts the storage device manager.
STEP 4: Enter the command “list disk” to display all available storage devices.
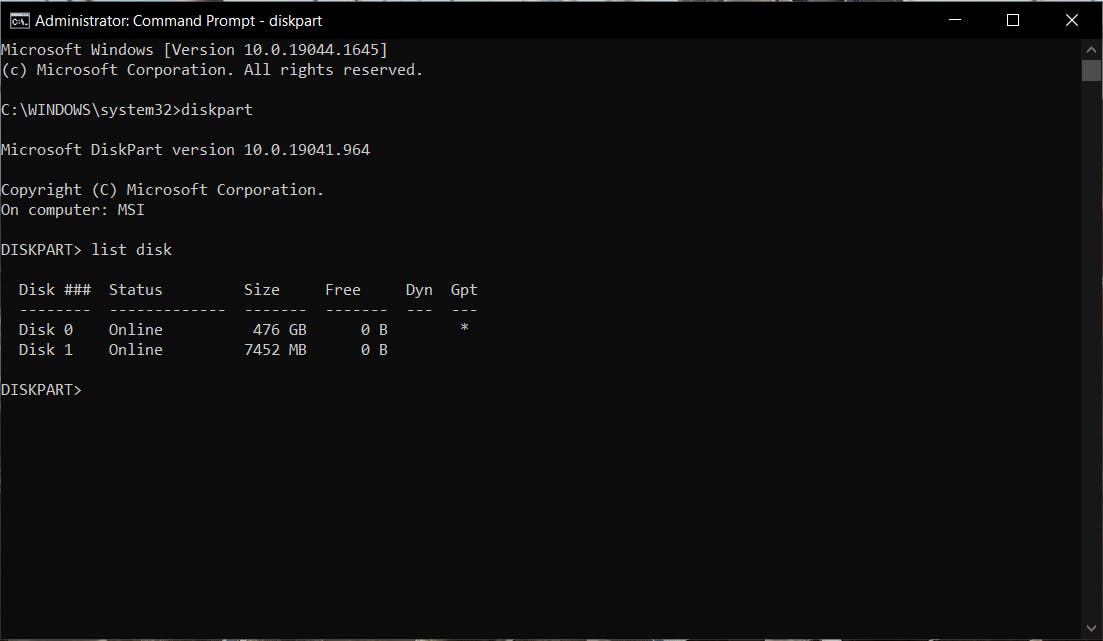
You can identify your USB by its storage capacity, and it’s usually listed as “disk 1”. In the system partition, “disk 0” is usually your PC's main storage.
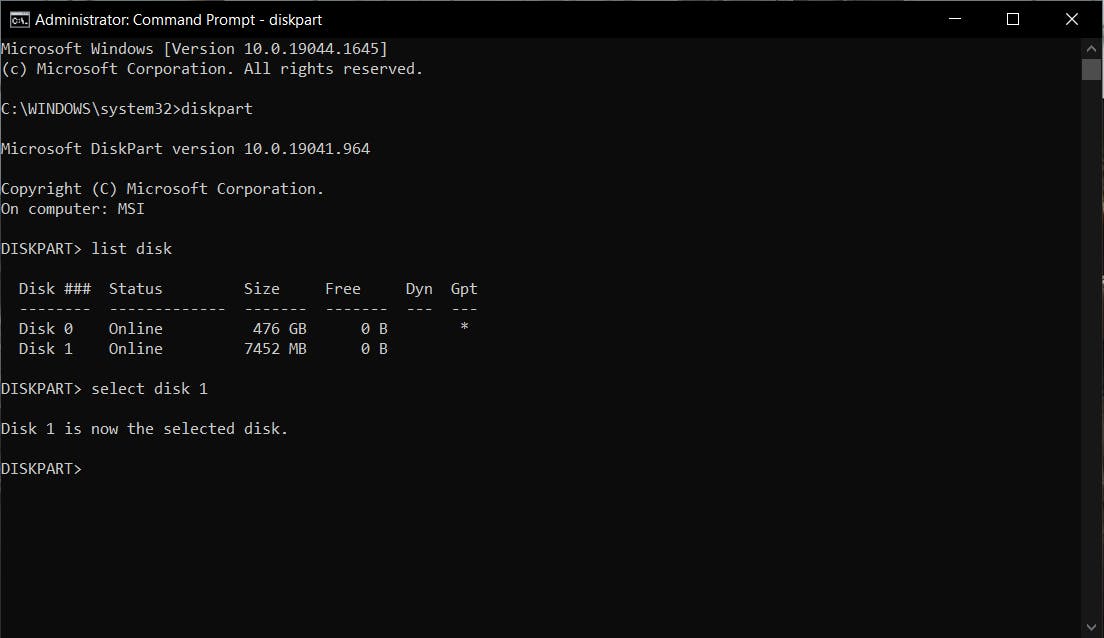
STEP 5: Based on the assumption that your USB has the labeled “disk 1”, enter the command “select disk 1” to select it (or the corresponding “disk 2”, etc.).
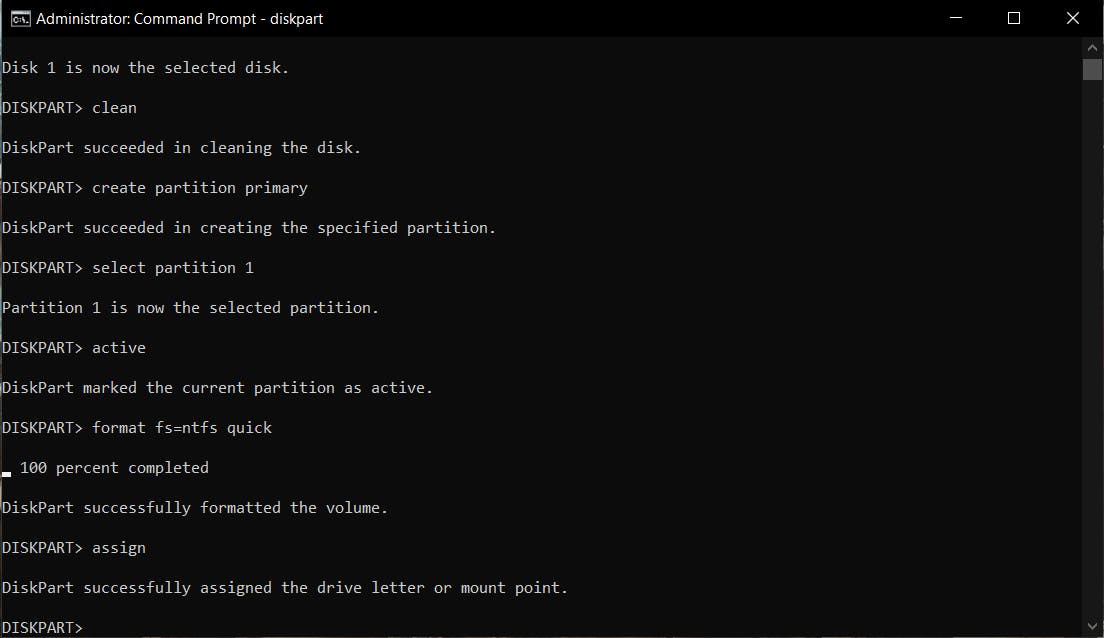
STEP 6: Enter the command “clean” to delete all files from the USB.
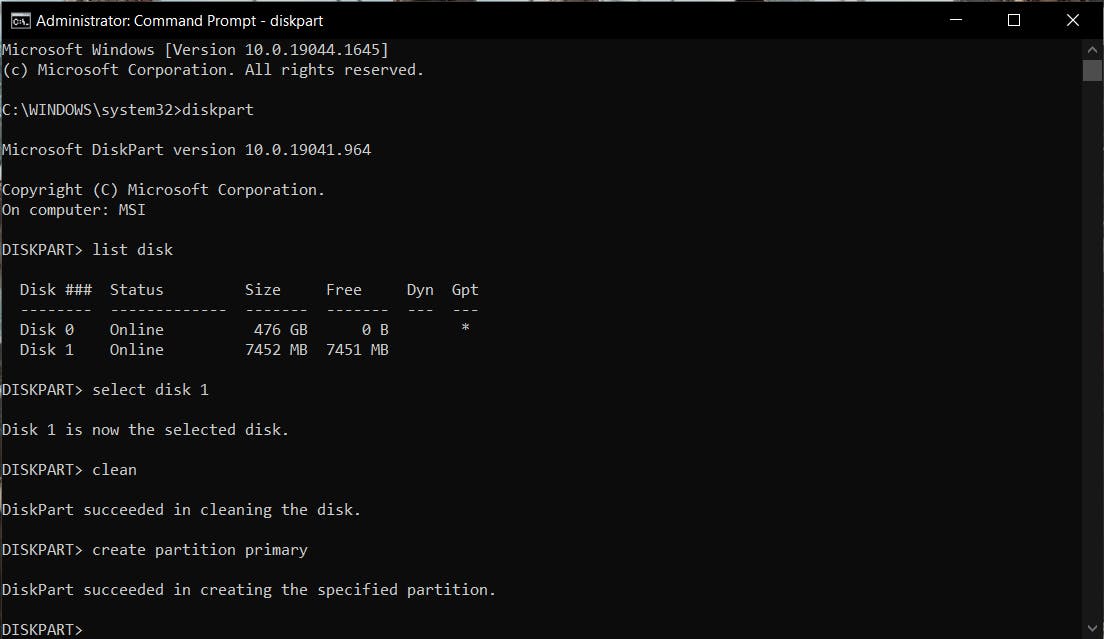
STEP 7: Enter the command “create partition primary” to create a main partition.
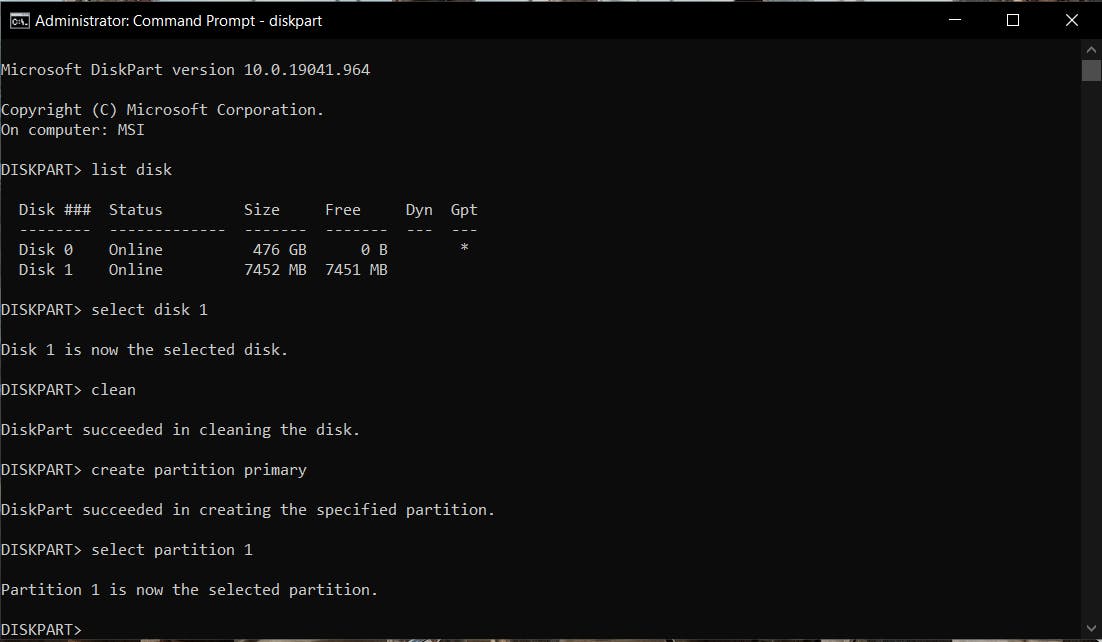
STEP 8:Enter the command “select partition 1" to select the newly created main partition.
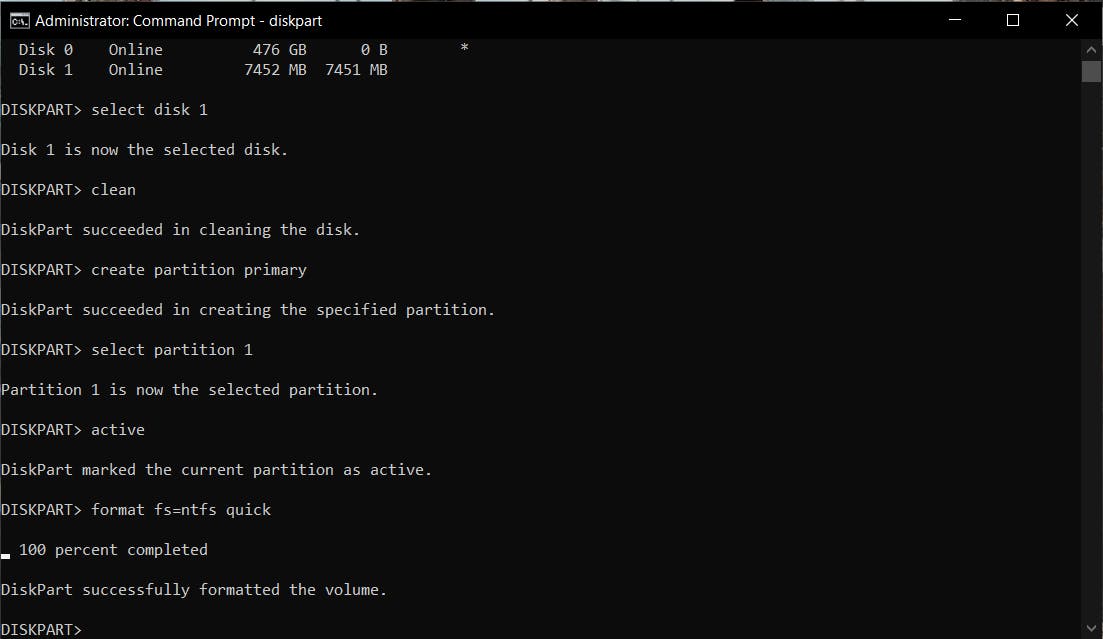
STEP 9: Enter the command "active" to Activate the partition.

STEP 10:Now enter the command “format fs=ntfs" to change the format of the Pendrive usually from fat32 to NTFS, it takes about 15-20mins based on your PC's performance, and to make it in time enter the command "format fs=ntfs quick"-this command changes the format within a minute.
STEP 11: After completing that process enter the command "assign", which automatically assigns a letter to your USB drive.
STEP 12: Enter the command "exit" to close the diskpart.

AT LAST COPY THE OPERATING SYSTEM ZIP/IMAGE FILE TO THE USB FLASH DRIVE.
LIST OF COMMANDS USED:
1.diskpart
2.list disk
3.select disk 1
4.clean
5.create partition primary
6.select partition 1
7.active
8.format fs=ntfs / format fs=ntfs quick
9.assign
10.exit
That's it, folks. Thanks for reading if you have any doubts regarding the topic, please post them in the comments section so that I can help you out.